Required:
- Download VLC (download VLC media player)
- Install 32-bit vlc for the 32-bit VM or 64-bit for the 64-bit JVM VM
You can use the JMF library, but it seems that it is outdated and old, so the developers started to develop from the famous VLC library of C++ a library called vlcj (the j for java).
We're going to show you a quick example of how to use this wonderful library. Just copy and paste the code located in the example below into your preferred IDE: Elipse or Netbeans. Note that you need to download vlcj library and integrate it into your project and into your classpath.
One mistake made is that the Java VM is used with a 32-bit version of VLC. It's not going to work just because you have to use the 64-bit VLC version with 64-bit JDK and the 32-bit VLC version with 32-bit JDK.
Two essential classes:
- Download VLC (download VLC media player)
- Install 32-bit vlc for the 32-bit VM or 64-bit for the 64-bit JVM VM
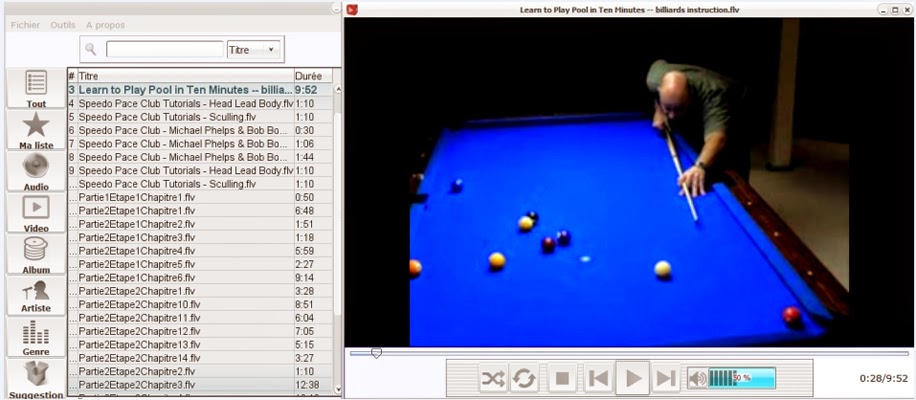
A media player that we made 100% in Java
You can use the JMF library, but it seems that it is outdated and old, so the developers started to develop from the famous VLC library of C++ a library called vlcj (the j for java).
We're going to show you a quick example of how to use this wonderful library. Just copy and paste the code located in the example below into your preferred IDE: Elipse or Netbeans. Note that you need to download vlcj library and integrate it into your project and into your classpath.
The goal is to make sure you have a working environment. This step is critical in coding any application that uses vlcj. If this simple application doesn't work, then all the rest of the applications that have been coded in java and that integrate vlcj won't work.
Look for native library
The path of the native library should point to the folder that contains the two files libvlc.dll and libvlccore.dll. In linux, the files are named libvlc.so and libvlccore.so. These two dll files are in the VLC folder, if you can't find them, download and add them to the folder where VLC has been installed.NativeLibrary.addSearchPath(
RuntimeUtil.getLibVlcLibraryName(), "C:/Program Files/VideoLAN/VLC);
One mistake made is that the Java VM is used with a 32-bit version of VLC. It's not going to work just because you have to use the 64-bit VLC version with 64-bit JDK and the 32-bit VLC version with 32-bit JDK.
Load native library
The vlcj API uses JNA which connects VLC to the library. This means that The Environment must To be Well configured so that the Java application would be able to locate the Bookseller native.
Native.loadLibrary(RuntimeUtil.getLibVlcLibraryName(), LibVlc.class);
Native.loadLibrary(RuntimeUtil.getLibVlcLibraryName(), LibVlc.class);
| void chargerLibrary(){ NativeLibrary.addSearchPath RuntimeUtil.getLibVlcLibraryName(), "C:/Program Files/VideoLAN/VLC"); Native.loadLibrary(RuntimeUtil.getLibVlcLibraryName(), LibVlc.class); } |
Two essential classes:
- MediaPlayerFactory: Initializes a single instance of libvlc and creates the drive instances. multimedia. We can Create multiple panels for each video, for example.
- EmbeddedMediaPlayer: Integrates a component of the media player into a UI component. It's with this class when can control anything that has a relationship with The user interface like prepare or start playback, full screen, etc.
Example
import java.awt.BorderLayout;
import java.awt.Canvas;
import java.awt.Color;
import javax.swing.JFrame;
import javax.swing.JPanel;
import javax.swing.SwingUtilities;
import com.sun.jna.Native;
import com.sun.jna.NativeLibrary;
import uk.co.caprica.vlcj.binding.LibVlc;
import uk.co.caprica.vlcj.player.MediaPlayerFactory;
import uk.co.caprica.vlcj.player.embedded.EmbeddedMediaPlayer;
import uk.co.caprica.vlcj.player.embedded.windows.Win32FullScreenStrategy;
import uk.co.caprica.vlcj.runtime.RuntimeUtil;
import uk.co.caprica.vlcj.runtime.x.LibXUtil;

/*www.codeurjava.com*/

 public class MediaPanel {

 public static void main(final String[] args) {
 SwingUtilities.invokeLater(new Runnable() {
 @Override
 public void run() {
 chargerLibrary();
 new MediaPanel(args);
 }
 });
 }

 void chargerLibrary(){
 NativeLibrary.addSearchPath(
 RuntimeUtil.getLibVlcLibraryName(), "C:/Program Files/VideoLAN/VLC");
 Native.loadLibrary(RuntimeUtil.getLibVlcLibraryName(), LibVlc.class);
 LibXUtil.initialise();
 }

 private MediaPanel(String[] args) {
 JFrame frame = new JFrame("vlcj tutorial");
 frame.setLocation(100, 100);
 frame.setSize(1050, 600);
 frame.setDefaultCloseOperation(JFrame.EXIT_ON_CLOSE);
 frame.setVisible(true);

 //Create an instance of Canvas
 Canvas c = new Canvas();
 //The background of the video is black by default
 c.setBackground(Color.black);
 JPanel p = new JPanel();
 p.setLayout(new BorderLayout());
 //Video takes up the entire surface
 p.add(c, BorderLayout.CENTER);
 frame.add(p, BorderLayout.CENTER);

 //Create a factory
 MediaPlayerFactory mediaPlayerFactory = new MediaPlayerFactory();
 //Create a media player instance
 EmbeddedMediaPlayer mediaPlayer = mediaPlayerFactory.newEmbeddedMediaPlayer(new Win32FullScreenStrategy(frame));
 mediaPlayer.setVideoSurface(mediaPlayerFactory.newVideoSurface(c));
 //Fullscreen
 mediaPlayer.toggleFullScreen();
 //Hide mouse cursor inside JFrame
 mediaPlayer.setEnableMouseInputHandling(false);
 //Disable the keyboard inside JFrame
 mediaPlayer.setEnableKeyInputHandling(true);

 //Prepare file
 mediaPlayer.prepareMedia("vidéo.mp4");
 //play the
 mediaPlayer.play() file;
 }
 }
There you go! With just a few lines of code, you can now have your own media player. Start exploring the vlcj documentation online to develop your own app as needed.

Commentaires (0)
Laisser un commentaire
Connectez-vous pour commenter
Rejoignez la discussion et partagez vos connaissances avec la communauté
Chargement des commentaires...